Article Updates:
-
Speed Point Nerf 1/16/2025
-
Fear & Range Buff 1/16/2025
-
Enforce Buff 2/5/2025
-
Slow Command Notes 2/27/2025
While we may want eight cards of the same ability it is important to note that abilities are limited to three of a kind in your deck, NOT counting your Dragon. This was nerfed after two weeks of Beta play which initially allowed us to have four of a kind, not including our Dragon. (Any Single Pack decks that violate the current “Rule of 3” still exist and can be used but will be wiped by the end of the Beta)
Now how the game assigns values to our cards; the four sides of a card add up to a total. That total is reduced as Speed increases. The total is then further reduced by an amount relative to the card’s ability. Note that the potential minimum value on a Champion’s side is 1 while the maximum value is 50. (55 for Dragons)
For each ability I will give a brief overview of the effect and optimal amounts to have per deck. I will also cover my feelings on how this relates to High and/or Low Speed for as well as how useful the ability is on a Dragon. And not to worry, I won’t forget to talk about the importance of Terrain choice!
Let’s cover the abilities in cost order, starting with the cheapest.
Enforced
“Negates attacks and opponent’s abilities from 1 orthogonal and 2 adjacent diagonal sides.”
Overlooked in Alpha testing, the first week of Beta was absolutely dominated by Enforced, particularly ones with high speed. When played in bunches, Enforced can create multiple dead zones and attack angles which effectively reduces the overall scoring of a game. Since they only have three sides to spread their points between Enforced generally have good “min maxed” stat spreads. Even one Enforced can be used as an optimal “Blocker” card to deny your opponent’s Confuse/Fear/Stomp or even a points for an Aura, Flight and or Ranged.
Champion
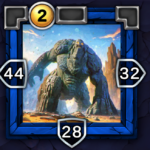
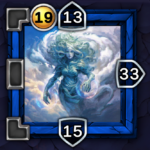
Like Rooted Fast Enforced are more consistent as their purpose is to deny your opponent multi-point plays. Remember their armored side blocks Challenges and Fear while their armored corners block Confuse and Range. Stomp can still affect them, but the enforced unit cannot be moved in a direction that leaves the enforced side facing the stomper. However early game when there is plenty of room for placement a Slow Enforced can provide a great “zone of control” with their massive stat pools. They can also consistently claim points off the High-Ground of the terrain due to tying for the highest stat total of the game with Rooted.
Dragon
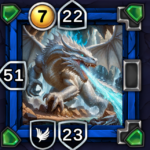
Just like their Champion counterparts I am going to recommend you favor high speed values as going first helps in preventing multi-point swings. Just like with Rooted I will note that a Fast Enforced can be particularly good when drawn late as it can plug a hole and prevent any manipulation by the opponent. Due to the recent return of Enforced having the same value as Rooted a slow Dragon of this type can have two very high sides to potentially generate big point swings while locking in a location. However the Speed is usually necessary to beat your opponent to the most relevant square.
Rooted
“Immune to opponent’s forced movement or rotation.” (Immune to Confuse, Fear & Stomp but can still be affected by Command)
Tied with Enforced for the highest total stat pool of all ability types, Rooted are generally the safest turn one play. With high stat pools you stand a good chance of claiming a High-Ground and your opponent can never Confuse/Fear/Stonp you away from the 2 point play. Rooted (along with Enforced) make for good “Blocker” cards as they cannot be manipulated and are tied for the highest stat total with Enforced. Remember unless winning challenges in multiple directions a Slow Rooted is most likely giving up positioning, a speed point and then only claiming 1 point in return. They do however create a “zone of control” as you can leave multiple sides of with values of 30+ exposed making it hard for opponents to position in subsequent plays.
Champion
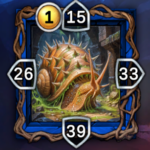
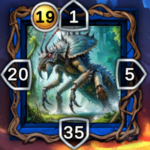
I only recommend this ability for Fast Champions. You’ll need high speed to guarantee you are gaining multiple points when selecting this Champion type. A Slow Champion is already at -0.5 net point differential due to giving up a speed point and if winning in two directions will only break even (assuming all your opponent did was simply gain 1 point off placing their Champion). Which is a shame because that Snail has a whopping stat total of 113!
Dragon
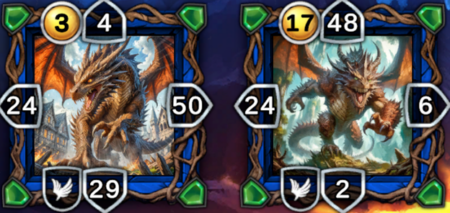
Since Dragons are generally played for a 3+ point swing the inability for your opponent to simply “undo” your point gain with Disruption (Confuse, Fear or Stomp) actually makes this one of, if not the single strongest ability to have on a Dragon. With their high stat total, you can run a Slow Dragon and aim to win a Flight bonus in multiple directions or a Fast Dragon and aim to win the Speed Point, a Flight bonus as well as a potential Challenge in another direction. You can’t go wrong either way. I will note that a Fast Rooted can be particularly good when drawn late as it can plug a hole and prevent any manipulation by the opponent while a Slow Rooted is terrible when drawn late as it becomes a glorified Flight card.
Aura
“Plus 2 points if winning 2 or more Challenges.”
Win Challenges in two orthogonal direction (aka cardinal, aka not diagonal) and the Aura activates for another +2 victory points. Overall, this ability has a high upside when it hits and when it doesn’t (usually due to Confuse/Fear/Stomp) it falls flat. Slow Aura have enough overall stats to consistently win in multiple directions while Fast Aura can potentially race an opponent to a space for the bonus. As a side note you should always run 1 Command in decks with an Aura to late game undo your opponent’s Disruption and activate the Aura bonus.
Champion
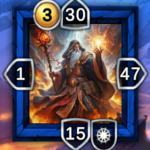
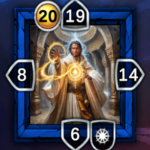
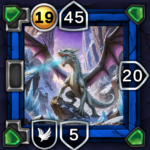
Generally the slower the better. At low speeds you can potentially have 2 sides of 30+ or one side of 40+ and 2-3 average sides. I personally recommend Slow Aura for consistency. Fast Aura can be useful but you’ll need them to be fairly min maxed so you can win a difficult challenge in one direction and an easy challenge in another. You can try running multiple Aura to force your opponent to concede at least one bonus but at that point Flight will be netting you more points on average. I generally like to have 1 or 0 of these in a Constructed deck but others aim to have 2-3 and try to force the issue with overall high stats. Pay special attention to how the stats are distributed and how easily you can break all sides of your Terrain for an easy early Challenge win. For example this 20 Speed Aura has a low side of 6. Therefor if you have a terrain with a side of 5 or less the Aura can be slotted to challenge that portion of the terrain and it cannot be forced to lose that challenge later on via Confuse or Fear. This means you only need to win in one other direction to gain the Aura Bonus. This can usually be accomplished with good use of Disruption, particularly Stomp to move opponent’s cards into challenging the Aura.
Dragon
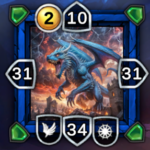
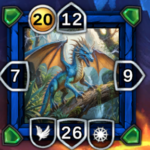
Slower Dragons will have higher stats and therefore a higher chance of triggering Flight, as well as Aura. They can easily be responsible for 5+ point swings and that is before considering the points you may get with the ranged corners. This makes Slow Aura Dragons arguably the most powerful in the game. However if drawn late they provide little more than their Flight bonus and are generally very vulnerable to Disruption. If you opt to use one you’ll need to hold onto your Command Champion until either turn 7 or a moment where you can optimally rotate your Dragon while also blocking off all nearby spaces where a Confuse or Fear Champion can be played. Once again a min maxed Fast Aura can instantly claim a spot for the bonus but can often be dead cards in hand in the exact opportunity does not present itself.
Flight
“Plus 1 point for each Challenge won with Power difference of 10 or more.”
While Aura requires wins in 2 directions to gain their bonus, Flight bonuses are granted for every direction you win by 10 or more. What this means is a well-rounded Flight card can potentially claim up to 8 points (with a lot of help from Stomp etc.) while one with at least a very high combat value side is usually good for an easy 2 points. When aiming for Fast Flight cards try to use ones with at least one side that has a value of 40+. When using slower Flight, you should try to have 3 or potentially all 4 sides capable of gaining a Flight bonus (which means sides need to be 11+ to potentially be 10 higher).
Champion
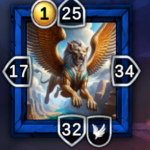
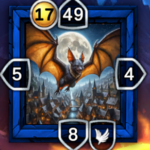
Flights are the perfect cards to round out any deck. Capable of gaining multiple points on their own they can be useful at all stages of the game. Just remember Flights that are stat heavy on just one side become quite vulnerable to Disruption and Slow but well-rounded Flights will need plenty of support to force enemies into the Flight bonus. I have personally found that a slow Flight (like the one depicted above) works very well with multiple Stomp allies where as a Fast Flight can just find a random place to be dropped and gain 2 points.
Dragon
ALL Dragons have Flight, 4 Ranged Corners as well as another ability. Treat your Dragon as your “Super” or “Hero” Champion as much as possible and try to always use it for big point swings!
Range
“Can attack on 2 marked diagonals.”
As of 1/16/2025 Range was buffed to have the same total stats as Aura and Flight. Not only that but the highest value side will always be adjacent to at least one ranged corner. The important thing to note about this ability is that the ranged effect can snag points regardless of combat value. Optimally you’ll want to play them in a position to gain 2-3 points without being interrupted but between Confuse, Command, Fear, Stomp and only seeing 2 cards a turn there is only so many things you can play optimally all game. Their best use is to create a “zone of control” around a square (usually the terrain) to prevent your opponent from freely playing or as the board fills up, to gain points around other cards via their Ranged corners.
Champion
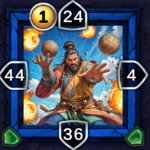
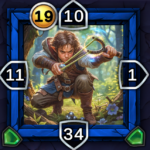
Since the ranged corners are not at all based on combat value I recommend all Ranged Champions to be fast. Take your speed point and whatever points you can get from ranged while finding an optimal position to annoy your opponent. At worst they can also serve as a decent “Blocker” card to take a space your opponent needs while still gaining 1-2 points because of your corners.
Dragon
ALL Dragons have not 2, but 4 Ranged Corners, Flight and another ability. And in case you forgot…. Treat your Dragon as your “super” or “hero” Champion as much as possible and try to always use it for big point swings!
Confuse
“Active: Rotate a diagonal enemy.”
Compared to their Disruption cousins (Fear & Stomp) Confuse have much higher stats. The reasoning is because when played Diagonally you are not directly challenging the Champion being rotated and are potentially gaining less immediate victory points. As the game goes on and the board gets full you can find ways to gain Challenge points and cause Disruption. Early on however if you pay close attention to the Terrain you may be able to rotate an enemy so they lose a High-Ground bonus while gaining one of your own. In fact the Terrain, coupled with your deck construction goes a long way to determining if your Confuse should be Fast or Slow.
Champion
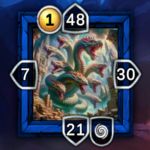
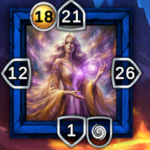
To consistently accomplish a multi-point play on turn 1, you’ll need a Slower Champion to allow your opponent to make their play and then disrupt them.
Fast Confuse however are more useful in the late game. As the turns progress you may find an opportunity to surround an enemy, rotate it to make a huge point swing and block any opening for a Command. The problem with this is consistency. What happens if on turn 1 you have both your Command Champion and your Fast Confuse? You’ll be forced to waste the effect of one which is not optimal, or not run any Command. To best make this work you’ll want to pair Fast Confuse with a Rooted heavy deck. With most of your Champions immune to Disruption you’ll have less of a need to include or rely on a Command.
If ever running multiple it is important to have ones with very high value sides. Inevitability you will draw both, have nothing to rotate and then at the very worst be able to take a High-Ground 2 for points.
Dragon
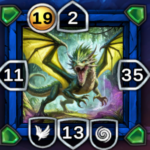
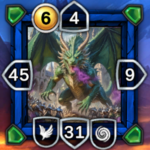
Due to Confuse being a Diagonal skill I quite like it on Dragons. You still have a decently high stat total to take advantage of Flight and you’ll always be gaining at least a Diagonal point upon play. This is definitely a type that the Speed can go either way for. Being Fast is generally good overall but only if you have at least one high value side to win challenges with a Flight bonus. Otherwise the Slow Confuse will be a more consistent net point swing.
Command
“Active: Rotate adjacent ally (orthogonal or diagonal).”
Command is the friendly version of both Confuse & Fear combined as it can work from any adjacent space. The downside to this is without an allied unit that is in a comprised position, the effect goes to waste. To optimally make use of Command you can never have more than 1 in your composition as their effect does nothing on turn 1. In fact, even if played on turn 2 you then allow 5 more turns for your opponent to undo your Command. This means that when drawn this is effectively a dead card for multiple turns and you’ll always be forced to play the other option.
Champion
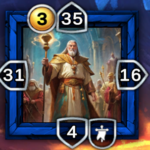
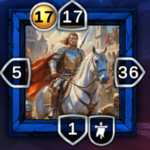
After reading the overview you may be thinking that even including a Command in your composition is a double-edged sword; and you’re right. Realistically this is a dead effect until turns 4-7. In fact, to optimally play this before turn 7 you need to be sure your opponent cannot undo your effect with a follow up Fear or Confuse. This can only be done if you are completely blocking off all surrounding spaces or potentially following up with a fast unit to ensure you are blocking the vulnerable space on the next turn. Considering this is often played late and for a specific purpose I recommend your Command always be fast. Snag your speed point and ensure you can play it in a relevant position to optimize the effect before your opponent blocks you. I will note the one advantage to a slower Command is that if your opponent picks a faster Disruption card you have the potential to undo their play. However if their faster card fills the space you needed to Command from you just lost out on a lot of points. Plan accordingly.
***2/27/2025 Edit: Lately I have been making use of Slow Command. The obvious advantage is that if you lack a 18-20 Speed Command you may as well chose a Slower one for better stats. However whenever you recognize that your optimal Command target only has 2 adjacent spaces left near it you’ll need to pick the Command that turn. This ensures you can still get to it and rotate before you are cutoff from the spot, despite your low speed. It is recommended to have one very high side (40+) and a good secondary side (20+) to make use of whatever position the Command is stuck in.
Dragon
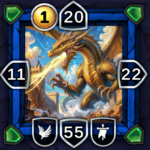
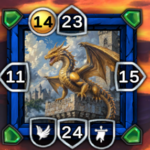
This is the worst ability in the game to have on a Dragon. You will always want your Dragon in a position to gain as many points as possible. Not only does Command not aid the Dragon to gain points via Flight Bonus but saving it for late game plays costs you optimal positioning for points off the ranged sides. If you, however, insist on making this work, I recommend you run a Command Dragon and a Command Champion. This way when you draw both early you can at least play the Dragon for the Flight bonus and the “zone of control” your four cornered range offers you. If lucky you can force your opponent to use multiple Disruptions on one target and create a smoother mid-game experience as well as Command your Dragon late game to regain a lost Flight bonus. As we are reaching the more expensive abilities in the game you may want it to be a Slow Dragon as higher stats will trigger Flight. You can also use this to take advantage of a slightly faster Disruption and undo their play the same turn it is made.
Fear
“Active: Rotate an orthogonal enemy.”
Confuse’ s orthogonal cousin; the Fear mechanic can single handedly undo your opponent’s multi-point play. Be wary when played early however as you may struggle to find relevant point swings if the board is not too developed. In fact, unless your Fear is slow you might have to treat it like Command and hold onto it for multiple turns to ensure any value is gained from the ability whatsoever. Otherwise you’ll need a Fast Fear with a high value side (Usually 40+) to ensure that at the very worst you are challenging a High-Ground. As of 1/16/2025 Fear was buffed to have more stats than Stomp, but less than Command.
Champion
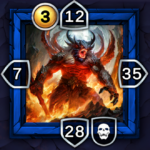
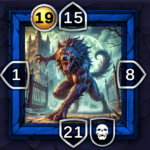
Since you want something in play to disrupt and the ability is expensive you usually want a slower Fear to allow your opponent to make plays and then ruin them. Exceptions however can be made if you somehow have a min-maxed Fast Fear that can Challenge High-Grounds. At the very worst, such a Champion can at least make a play for a Speed Point and a High-Ground bonus whereas early on a Slow Fear aims to gain one point while reducing your opponent’s points. Similar to every other ability that affects something already in play this suffers from being fast in that the effect is wasted. Not only that, but the low overall values can easily prevent you from taking a High-Ground bonus.
Overall while the effect is powerful, I cannot recommend you ever run more then 1 Fear as you’ll struggle to find optimal plays for them early. If your opponent plays multiple, Rooted (or Enforced) their powerful effect can frequently go to waste when drawn early.
Dragon
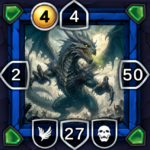
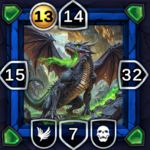
This is the next worst ability to have on a Dragon after Command. In fact, it is arguably worse since the ability is more expensive, so you’ll have less stats to potentially trigger a Flight Bonus. Their one saving grace is that since you are rotating the target you are challenging you can most likely force at least one Flight bonus while ruining your opponent’s play. Since Fear generally functions better at low speed, I can only recommend you pick your slowest Fear Dragon possible unless you lucked out on some crazy min-maxed stats.
Stomp
“Active: Can be played on opponent’s card to push it to empty orthogonal square.”
A unique form of Disruption that directly takes over the square of an enemy and pushes it to an open square. Personally, this is my favorite form of Disruption. When possible, try to find Stomps that are either well rounded or have their highest values on opposite sides as you are frequently playing your stomp in between two potential Challenges (two enemies or an enemy and the Terrain!)
Champion
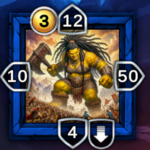
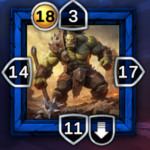
Like Fear I favor Slow Stomps so you’ll have an enemy to disrupt. Personally, I try to find Stomps with one side having a value of 40+ so I can potentially move an opponent away from a High-Ground bonus and claim it for myself. Even though you’ll be giving up the Speed Point to do so on turn 1 you can reduce your opponent’s points by 2-3 while gaining 2-3 for yourself. Mid to late game a more well-rounded Stomp or one with their highest values on opposite sides become valuable as you’ll frequently be in the middle of multiple Challenges.
Dragon
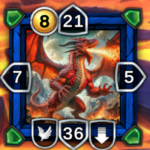
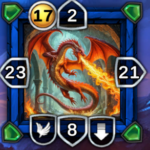
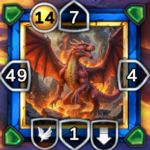
With some optimal positioning a Stomp Dragon can be just as if not more threatening than an Aura Dragon. In a mid-to-late game scenario you can jump into the middle of a group of enemies, claim a Flight Bonus in 1-2 directions while potentially claiming multiple range points as well. The best part is you’ll already be surrounded and are hard to Disrupt. A Faster Stomp has more potential to snag this position before your opponent can block you, but a Slower Stomp is more likely to be gaining flight bonuses while doing so. Personally, I like slow ones as it makes Stomping in general more consistent. As always you can make a special exception should you find a Dragon with just the right stat spread.
Terrain

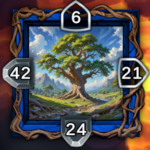
Often overlooked this starting tile is the key to victory. The first choice one has to make is between Terrain with opposite or adjacent High-Grounds. The difference is if you run Confuse, especially a Slow Confuse. With Confuse in mind you can play for one High-Ground bonus while rotating your opponent to un-claim another. This tactic can make your deck more consistent. Knowing this can also prevent you from being vulnerable to Confuse as well.
The second thing to consider about Terrain is how easily all 8 of your cards can break the High-Ground sides. Optimally all of your cards should at the very least be able to break the lower of the two High-Ground values. In fact the majority of your cards are better off if they can break the higher value as well. This is especially true for your Stomp cards as they can force an opponent to un-claim a High-Ground while you claim it. If lucky a majority of your cards should aim to break the lower High-Ground side with their second highest value; allowing for their best value to contest another space.
Finally, how easily can you break the remaining two sides, particularly with the weaker sides of your various units? This can be particularly handy for Aura (and Flight) cards as you can often snag a forgotten weak Terrain side while also Challenging an enemy. The ability doesn’t just need opposing cards to trigger, Terrain works as well! Now if your Aura can break the Terrain regardless of what side is facing it you are now also harder to Disrupt with Confuse or Fear.
Finally; compare the High-Ground values to your Flight and Dragon cards. Try to have at least one of them be 10 lower so you can claim it with the Flight Bonus.
Conclusion
Remember we are still in Beta. Unit values and the meta are currently in flux so don’t be afraid to try different compositions. Experiment with min maxing values, high speed, low speed and if nothing else; have some fun!
Oh and if you made it this far… Congratulations, you’re a nerd!

